As someone interested in following DevOps practices it is my goal to find the best solutions that work with our company’s principles.
At its core, DevOps is a strategy of teaming together administrators and developers to form a single unit with a common goal of working together to provide faster deployments, and better standards through automation. To make this strategy work, it’s essential to continuously explore new tools that can potentially provide you with better orchestration, deployments, or coding practices.
In my search for a more programmable HTTPD load balancer I spotted Traefik. Intrigued by the various features and backend support for Docker, I quickly spun up a VM and jumped straight into learning how-to integrate Traefik with Docker.
My first glance at the file-based configurations for Traefik had me a little uneasy. It was the first time I encountered the TOML formatting. It wasn’t the YAML like I encounter in most projects, or bracket-based formatting that I would have encountered in the past with Nginx, Apache or HaProxy. This Traefik Tutorial will cover terminology and demonstrate how to set up Traefix with Nginx on Docker.
Traefix Terminology
Before I jump into my tutorial of Traefix with Nginx on Docker I’ll go over the new terminology that has been introduced with Traefik:
- Entrypoints – The network entry points into the Træfik daemon such as the listening address, listening port, SSL certificates, and basic endpoint routes.
- Frontend – A routing subset that handles the traffic coming in from the Entrypoints and sends the traffic to a specified backend depending on the traffics Header, and Path.
- Backend – The actual configurations subset that sends the traffic from the frontend to the actual webserver. The webserver selected is based on the load balancing technique configured.
A basic demonstration of Traefik with Nginx on Docker
In demonstration of a basic Traefik setup, we will only focus on the file-based configuration of Traefik Entrypoints. This is due to the fact that Docker dynamically builds the Frontend and Backend configurations through Traefik’s native Docker Swarm integration.
Let’s start by defining two basic Entrypoints with the “defaultEntryPoints” flag. Under this configuration flag we created two Entrypoints labeled these ‘http’, and ‘https’. These labels represent the everyday traffic we see within our browsers. Under the “[entryPoints]” field within the configuration define the labeled entry point ‘http’ to utilize all interfaces, and we assign it port eighty for inbound traffic. Under the same Entrypoint label we instruct that all traffic entering port eight to be redirect to our second Entrypoint labeled “https”. The Entrypoint labeled ‘https’ follows the same syntax as the one labeled ‘http’ with a slight deviation on how it handles the actual web traffic.
Without a redirect it instructs Traefik to accept the traffic on port 443. We also instruct Traefik to utilizes secure certificates for web encryption and were to load the SSL certificates. A full example is shown below, and can also be found within our Github repository.
defaultEntryPoints = ["http","https"]
[entryPoints]
[entryPoints.http]
address = ":80"
[entryPoints.http.redirect]
entryPoint = "https"
[entryPoints.https]
address = ":443"
[entryPoints.https.tls]
[[entryPoints.https.tls.certificates]]
certFile = "/certs/website.crt"
keyFile = "/certs/website.key"
The TOML configuration we have built is all that is required for a dynamic Docker demonstration. This file will need to be saved as traefik.toml. The configuration file will be used on our Docker Swarm management nodes and needs to be saved on each management node in your Docker Swarm.
To keep focus on Traefik we won’t go into the setup, and configuration of a Docker Swarm cluster. That will be a topic of discussion in a future blog post and will be back referenced here at some point in the future. We will design a basic Docker compose file to demonstrate the Dynamic loading of Traefik with a default Nginx instance. Within the Docker Swarm configuration file will focus on the Traefik image, and the Traefik flags required for basic backend load balancing.
Let’s start by downloading the docker-compose.yaml file that can be found on our github.com page. To download the file, you can go to https://github.com/gigenet-projects/blog-data/tree/master/traefikblog1.
The entire code repository can also be cloned the following command:
[root@dockermngt ~]# git clone https://github.com/gigenet-projects/blog-data.git
[root@dockermngt ~]# cd blog-data/traefikblog1
The docker-compose.ymal:
version: '3.3'
services:
nginx:
image: nginx
ports:
– target: 80
protocol: tcp
mode: host
networks:
– distributed
deploy:
restart_policy:
delay: 10s
max_attempts: 10
window: 120s
labels:
traefik.frontend.rule: “Host:traefik,demo.gigenet.com”
traefik.port: “80”
traefik:
image: traefik
volumes:
– /var/run/docker.sock:/var/run/docker.sock
– /opt/traefik/certs/:/certs/
– /opt/traefik/traefik.toml:/traefik.toml
deploy:
restart_policy:
delay: 120s
max_attempts: 10
window: 120s
placement:
constraints: [node.role == manager]
networks:
– distributed
ports:
– 80:80
– 443:443
– 8080:8080
command: –docker –docker.swarmmode –docker.domain=demo –docker.watch –web –loglevel=DEBUG
networks:
distributed:
driver: overlay
Under the Traefik service section we will specifically will focus on the Docker compose flags labeled volume, deploy, placement, networks, ports, and command. These flags have a direct impact on how the Traefik Docker image will operate, and need to be configured properly.
Within the volume flag we pass in the docker socket, and the Traefik TOML configuration file we built previously. The Docker socket is used by Traefik for API purposes such as grabbing the Traefix label flags that are assigned to other Docker services. We will go into this in further detail in a few steps. The actual Traefik configuration we built earlier utilized both http, and https. We defined these Entrypoints to tell the Traefik container image the base configuration it will use when starting for the first time. These configuration flags can be overwritten with Docker labels, but we will not be going into such advanced configurations within the blog. As the configuration file had a focus on encryption the configuration will be mounting our SSL certificates under the /certs directory on the Traefik container. The Traefik TOML configuration file, and SSL certificates should be installed on every Docker management node.
Under the deploy section we take focus on the placement flag. Traefik requires the Docker socket to get API data, and only management nodes can provide this data in a Docker Swarm. We tell the placement of the Traefik container to be constrained to only Docker names with a management role. This simple technique will enforce the requirement.
The network flag is a must have for Traefik to work properly. With Docker clusters we can build overlay networks that are internal to just the VM’s assigned to the network. This provides containers with network isolation. For the load balancing to work we need to have the Traefik container on the same network as every webhost we plan to load balance traffic too. In this case we named our network “distributed” and set it to use the overlay driver.
How inbound traffic is passed to the overlay network
The port flag is very simple, and straight forward. On the Traefik configuration we assigned ports 80, and 443 to take in traffic, and forward traffic. The ports map the port of the container to the live port within the container. We also enable port 8080 in this example, and this is so we can demonstrate the web dashboard that Traefik provides. A snippet of the dashboard of a live cluster is shown below:
Lastly, the command flag will parse any additional commands that we did not configure in the Traefik TOML configuration file directly onto the Traefik binary on boot. We tell Traefik to utilize the Docker backend, and enable the dashboard with this Docker compose demonstration.
Now that we understand the Traefik section of the Docker compose file we can go into detail on how the other services such as Nginx are dynamically connected to the Traefik load balancer. Within the Nginx service we will focus on the ports, networks, and labels flags.
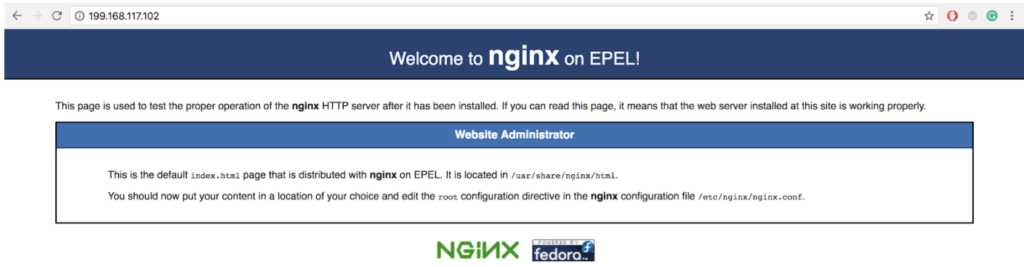
With this specific Nginx container image our web browser will only see a default Nginx “Welcome to nginx!” web page. With focus on the ports flag you’ll notice we are opening port eighty so that packets are not firewalled off by the Docker management service. In the Traefik service piece, we mentioned that the network has to include the same network as Traefik. Within our Nginx service you will notice the required network “distributed” has been assigned.
The labels flag is the most interesting section of the Nginx service. Within the label we set a few flags for Docker to register on the Docker Management API. This is how Traefik will know which backend to assign, and if that backend is alive. To keep this demonstration simplistic, we tell Traefik that the Nginx service has a single Nginx virtual host named ‘demo.gigenet.com’. To assign this to the Nginx service we utilize the ‘traefik.frontend.rule’ flag under the labels section as followed ‘traefik.frontend.rule: “Host:traefik,demo.gigenet.com”’. Notice how the Traefik Frontend is defined within the Docker compose configuration file, and not on the file-based Traefik configuration file. With this flag set Traefik will be able to get every IP address assigned under the network overlay. Traefik will also need to know which ports on the Nginx services are listening, and this is done by the flag “traefik.port”. In our example we assigned port eighty to the “traefik.port” flag, and this also represents the port we opened for network traffic.
With this configuration explained, and ready. It’s now time to launch the Docker stack we built and test out the load balancing. To launch the Docker stack run the following command within the Docker management node.
[root@dockermngt ~]# docker stack deploy --compose-file=docker-compose.yaml demo
You should now see the “Welcome to nginx” page within your browser when going to the domain name you specified. You can also review the actual load balancing rules by appending :8080 to this domain as showing in the previous picture.
Already have enough on your plate? Explore GigeNET’s managed services.